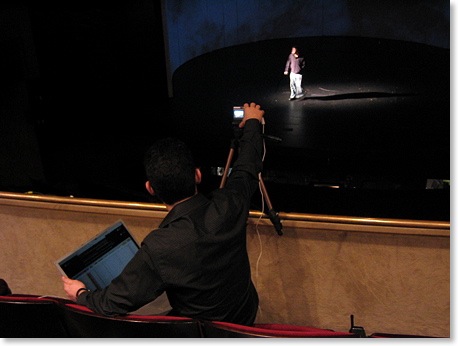
FocusTrack and RigTrack can simplify the task of photographing your focuses by controlling your digital camera as well as your lighting console. This means that you can just press ‘next focus’ on your laptop and have FocusTrack take care of everything else (-in fact, you can even have FocusTrack automate the whole process while you go to lunch, but it’s usually better to be there keeping an eye on things in case lights aren’t working).
FocusTrack doesn’t control your camera directly. Instead, it requires you to use the control software supplied with your camera; FocusTrack triggers that software, which in turn triggers the camera. This triggering takes place using Apple’s Applescript technology, which is why this functionality is only available when FocusTrack is running on a Mac.
By default, FocusTrack comes configured to control Canon Eos cameras via Canon’s ‘Eos Utility’ software. This software has always been slightly unreliable in use.
We are now recommending a different way of controlling cameras: Apple’s Image Capture program. This is supplied as standard with every Mac; you’ll find it in your Applications folder.
In testing, Image Capture has proved to be very reliable. It is also compatible with a much wider range of cameras, including Nikon cameras. The simplest way to find out whether it’s compatible with yours is to connect your camera to your Mac and try it...
1. Connect your camera.
2. If your Mac is set up to open iPhoto when a camera is connected wait until it finishes opening, then Quit iPhoto.
3. Run Image Capture.
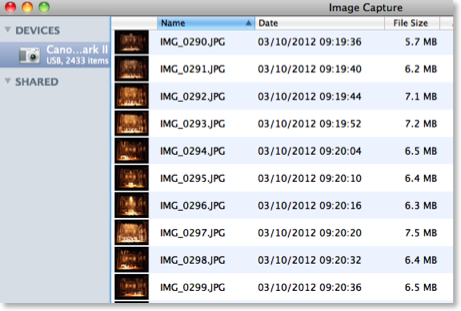
4. Your camera should appear under ‘devices’ in the left-hand column. A list of the photos on your camera will probably also appear; Image Capture also allows you to import photos from your camera to any location on your hard drive.
5. Go to the File menu and select Take Picture... A new window will appear:
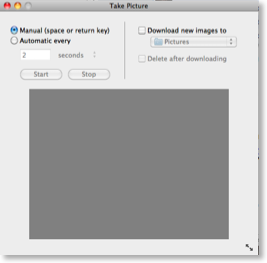
6. Make sure that you have ‘Manual (space or return key)’ selected. Then press the space bar and see if your camera takes a picture! If so, Image Capture will work with your camera.
7. Decide whether the pictures will stay on your camera as they are taken or will be downloaded to your computer as you take them using the options on the right-hand side of the Take Picture window. Downloading each picture as it is taken can slow things down a bit; if you’re trying to take a lot of focus pictures quickly in a work call it might be better to just leave them on the camera so you can download them later in your own time.
Now you need to configure FocusTrack to use Image Capture instead of the Canon software:
1. Go to FocusTrack’s Prefs screen, scroll down to the ‘Camera Control’ section.
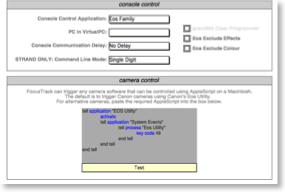
2. In the ‘Camera Control’ box, you need to change the AppleScript to trigger ImageCapture. Copy the Applescript below and paste it into FocusTrack’s Camera Control box, replacing the existing script:
tell application "Image Capture"
activate
tell application "System Events"
tell process "Image Capture"
key code 49
end tell
end tell
end tell
(If you need to switch back to the Canon software, you’ll need to paste this Applescript back into FocusTrack:
tell application "EOS Utility"
activate
tell application "System Events"
tell process "Eos Utility"
key code 49
end tell
end tell
end tell
(NOTE: From FocusTrack v2.221, you will find two buttons next to the AppleSript box that let you configure FocusTrack to use either the Canon software or Apple Image Capture more easily!)
3. With your camera turned on, press the ‘Test’ button. FocusTrack should trigger your camera to take a picture.
With that working, you need to tell FocusTrack and RigTrack you want them to trigger your camera during Photo Shoots:
1. Go to the Photo Shoot screen in FocusTrack or RigTrack. At the top there is a section for configuring what happens during photo shoots.
2. If you want FocusTrack to trigger your camera, check the checkbox below the camera icon. With this checked, FocusTrack will take a picture if you press the ‘TAKE PICTURE’ or ‘TAKE PIC/NEXTON>’ buttons, or when you press ‘OK’ at each lamp focus when using Photo Shoot Loop mode, where the console steps through each lamp-focus in turn for you.
3. If you want the console to work through a complete photo shoot without you, check ‘Automted’ then use Photo Shoot Loop Console. FocusTrack will ask youhow long it should wait between recalling a light to a position and taking a picture. You need to pick a time to suit the lights you are using - eg. ETC Revolutions take longer to get into place than Vari-Lite VL6s.
4. The ‘Wash Pic’ checkbox is useful if you want to take pictures of complete washes of lights as well as the focus of each individual light. If you have your Photo Shoot list sorted in palette order it will take a picture of each light in a focus individually, then turn on all of the lights in that focus and take a picture of them all together.
You can find more information on the whole process of photographing focuses with FocusTrack here.